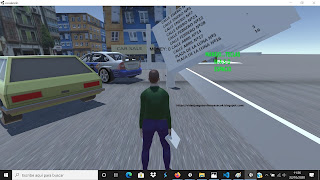
Como pinto personaje para mi proximo videojuego.Como hacer un circuito de coches.


1-Personaje en pantalla.

2-Editor de uv de imágenes.

3-Elegir personaje y pintar texturas.

4-Agregar contenedor, pintura normal.

5-Zoom asta marco, donde queremos pintar al personaje.

6-Elegir color,tono, claro u oscuro, difuminado o fijo.

7-Color carne, todo el personaje.

8- Elegir el archivo donde se ve lo pintado.

9-Guardar todo , y guardar archivo de lo pintado.

10-Pintar jersey verde oscuro.

11-Guardar todo, imagen pintada también.

12-Pintar pantalón , azul oscuro.

13-Guardar todo.

14-zoom asta los zapatos.

15-Pintar zapatos negros.

16-Zoom a la cabeza.

17-Elegir color del pelo, difuminado, pintar pelo castaño, marrón claro.

18-Guardar todo, imagen aparte también.


19-Detalle de los ojos.

20-Detalle del guardado de la imagen pintada.

CONTINUARA....
CON PASO A UNITY Y CON ACCESO JUGABLE DE ESTE NUEVO VIDEOJUEGO......EN LAS PROXIMAS SEMANAS...... PARA ABRIR APETITO UNA CAPTURA DE PANTALLA Y PRIMER SCRIPT EN C# DEL MOVIMIENTO DEL PERSONAJE.


using System.Collections;
using System.Collections.Generic;
using UnityEngine;

public class CONTROLREPARTIDOR : MonoBehaviour {

    // Use this for initialization
    //void Start () {
        
    //}
    public Animator Anim;
    public float WalkSpeed;
    // Update is called once per frame
    void Update () {

        if (Input.GetKey (KeyCode.W)) {
            Anim.SetBool ("ANDA"true);
            transform.Translate (Vector3.forward * WalkSpeed * Time.deltaTime);
        } else {
            Anim.SetBool ("ANDA"false);


        if (Input.GetKey (KeyCode.S)) {
            Anim.SetBool ("ATRAS"true);
            transform.Translate (Vector3.forward * WalkSpeed * Time.deltaTime);
        } else {
            Anim.SetBool ("ATRAS"false);


        if (Input.GetKey (KeyCode.A)) {
            Anim.SetBool ("ANDA"true);
            transform.Translate (Vector3.forward * WalkSpeed * Time.deltaTime);
        } else {
            Anim.SetBool ("ANDA"false);


        if (Input.GetKey (KeyCode.D)) {
            Anim.SetBool ("ANDA"true);
            transform.Translate (Vector3.forward * WalkSpeed * Time.deltaTime);
        } else {
            Anim.SetBool ("ANDA"false);


if (Input.GetButtonDown ("Fire1")) 
            {
//if ((Input.GetButton("Fire1")) {
        //if (Input.GetKey (KeyCode.Space)) {
            Anim.SetBool ("SEÑALA"true);
            transform.Translate (Vector3.forward * WalkSpeed * Time.deltaTime);
    
    } else {
            Anim.SetBool ("SEÑALA"false);


//if (Input.GetButtonUp ("Fire1")) 
            //{
//if ((Input.GetButton("Fire1")) {
        //if (Input.GetKey (KeyCode.Space)) {
            //Anim.SetBool ("DISPARO", true);
            //transform.Translate (Vector3.forward * WalkSpeed * Time.deltaTime);
        //} else {
            //Anim.SetBool ("DISPARO", false);


        }
    }
}
}
    }
}
}  //}
 
 
 ----------------------------------------------------------------------------------
----------------------------------------------------------------------------------------
--------------------------------------------------------------------------------------
 en este video de debajo como asignar movimientos con el teclado y el script


 Como pasar una textura desde blender a un personaje para unity


19-Seguir las imagenes del video , programa de unity y programa de blender.

20- Desde blender mirar ubicación del archivo pintado del personaje, lleva el nombre “repartidor Normal”formato PNG.

21-Esta en disco duro letra”D”.....ir a unity y buscar la carpeta de gráficos....arrastrar manteniendo pulsado el botón izquierdo del ratón el archivo “repartidor Normal”formato PNG.”al interior de esa carpeta y ya lo tenemos en los archivos de unity....

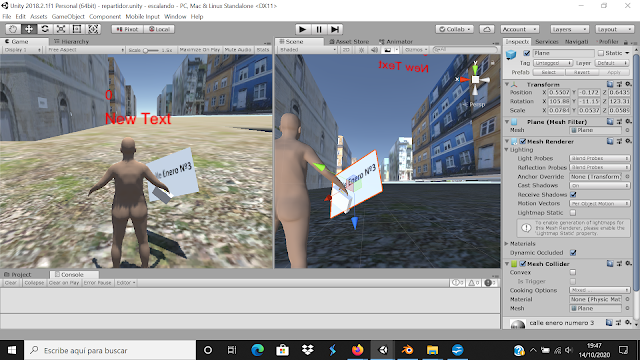
22-Desde unity elegir este archibo con el raton y arrastralo directamente al personaje en 3d que tenemos en la pantalla......y ya esta emos vestido un personaje....el de mi proximo videojuego.....

-------------------------------------------------------------------------------------
----------------------------------------------------------------------------------------
------------------------------------------------------------------------------------
😉😉😉😉😉😉😉😉😉😉😉😉😉😉😉😉😉😉😉😉😉😉😉😉😉😉😉😉😉😉😉😉😉😉😉😉
 
cC# script para sumar puntos
--------------------------------------------------------------------------------------
 
using UnityEngine;

// Include the namespace required to use Unity UI
using UnityEngine.UI;

using System.Collections;

public class bapuntos51 : MonoBehaviour {

    // Create public variables for player speed, and for the Text UI game objects
    public float speed;
    public Text countText;
    public Text winText;


    //public AudioSource tickSource;

    //public AudioSource tickSource;


    // Create private references to the rigidbody component on the player, and the count of pick up objects picked up so far
    private Rigidbody rb;
    private int count;/// <summary>


    /// //////////////////////////////////////////
    /// </summary>
    //private int PUNTOS;/// <summary>
    /// /////////////////////////////////////////////////
    /// </summary>

    // At the start of the game..
    void Start ()
    {


        //tickSource = GetComponent<AudioSource> ();

        //tickSource = Getcomponent<AudioSource> ();


        // Assign the Rigidbody component to our private rb variable
        rb = GetComponent<Rigidbody>();

        // Set the count to zero 
        count = 0;

        // Run the SetCountText function to update the UI (see below)
        SetCountText ();

        // Set the text property of our Win Text UI to an empty string, making the 'You Win' (game over message) blank
        winText.text = "";
    }

    // Each physics step..


    //void FixedUpdate ()
    //{
    // Set some local float variables equal to the value of our Horizontal and Vertical Inputs
    //float moveHorizontal = Input.GetAxis ("Horizontal");
    //float moveVertical = Input.GetAxis ("Vertical");

    // Create a Vector3 variable, and assign X and Z to feature our horizontal and vertical float variables above
    //Vector3 movement = new Vector3 (moveHorizontal, 0.0f, moveVertical);

    // Add a physical force to our Player rigidbody using our 'movement' Vector3 above, 
    // multiplying it by 'speed' - our public player speed that appears in the inspector
    //  rb.AddForce (movement * speed);
    //}


    // When this game object intersects a collider with 'is trigger' checked, 
    // store a reference to that collider in a variable named 'other'..
    void OnTriggerEnter(Collider other
    {
        // ..and if the game object we intersect has the tag 'Pick Up' assigned to it..


        //if (other.gameObject.CompareTag ("pruebassonido"))


        //if (other.gameObject.CompareTag ("bolaesplota"))
        if (other.gameObject.CompareTag ("ARAÑA-3-ESTE"))
        //if (other.gameObject.CompareTag ("Terrain"))

        
            //if (other.gameObject.CompareTag ("Pick Up 1"))
        //if (other.gameObject.CompareTag ("Sphere"))


        {
            // Make the other game object (the pick up) inactive, to make it disappear
            other.gameObject.SetActive (false);///////////////////////////////////////////////////////////////////////////////////////////////////////////////////////

            // Add one to the score variable 'count'
            count = count + 1;


            //tickSource.Play ();


            // Run the 'SetCountText()' function (see below)
            SetCountText ();
        }
            }

    // Create a standalone function that can update the 'countText' UI and check if the required amount to win has been achieved
    void SetCountText()
    {
        // Update the text field of our 'countText' variable
        //countText.text = "Count: " + count.ToString ();

        countText.text = "MONEY: " + count.ToString ();
        // Check if our 'count' is equal to or exceeded 12
        if (count >= 11
        //if (count >= 99) 
        {
            // Set the text value of our 'winText'
            winText.text = "JUEGO COMPLETADO";

            //TextMeshPro = "CAMPEON GANASTES"; 


            Destroy (gameObject1.2f); 

            //transform.position += transform.forward * 210.222f * Time.deltaTime; ///////etste solo
            //transform.position += transform.forward *110.02f * Time.deltaTime; 
            //transform.position -= transform.forward *8.02f * Time.deltaTime; 
            //transform.Rotate (new Vector3 (12 * Time.deltaTime, 220, 290), Space.Self);
            //Destroy (gameObject, 0.2f); 
            //transform.localScale += Vector3.right * 444 * Time.deltaTime;//OJOJOJOJOJOJOJOJOJO
            //Destroy (gameObject, 0.2f); 
            //transform.Rotate(10, Time.deltaTime, 100, Space.World);

        }
    }
}
    --------------------------------------------------------
 
----------------------------
 
 
 en este video como se hace lo de poner un contador de puntos score....


----------------------------------------------------------------------------------------
----------------continuara.....15-10-2020.............. 


23-Desarrollando el videojuego, tema un repartidor de revistas paquetes etc...., tema del video,

como mediante un script en c# y mediante el tag destruimos objetos concretos solo los que nos interesan y cuando nos interesan....


using System.Collections;

using System.Collections.Generic;

using UnityEngine;


public class DESTRUYEENERO5 : MonoBehaviour {


        //public AudioSource tickSource;


        void Start () {


            //tickSource = GetComponent<AudioSource> ();


        }


        void Update () {

        }


        void OnTriggerEnter(Collider other) {

            //if (other.gameObject.CompareTag ("avismo")){

        //if (other.gameObject.CompareTag ("ogri2")){

            if (other.gameObject.CompareTag ("Plane (2)NUMERO5")){

    //transform.Rotate (new Vector3 (0 * Time.deltaTime, 91, 90), Space.Self);


                //tickSource.Play ();

    Destroy (gameObject0.0f); 


            }}


    }


✋✋✋✋✋✋✋✋✋✋✋✋✋✋✋✋✋✋✋✋✋✋✋✋✋✋✋✋✋✋✋✋✋✋✋✋✋✋✋✋✋✋✋✋✋✋✋✋


24-En el sigiente video, podeis ver como sigo los pasos para tachar las direcciones repartidas, se trata de hacer un cartel por cada una de todas las direcciones , tachando las que se ban haciendo, en el primer cartel todas las direcciones en el segundo todas las direcciones tachando una, en el siguiente todas las direcciones tachando dos ,y asi sucesivamente.


En total unos 10 carteles uno puesto detrás del otro, cuando me acerco a la primera dirección y aprieto con el botón del ratón el repartidor levanta los brazos haciendo que echa algo al buzón, mediante el script Activate Trigger el buzón se cambia a otro que tiene la revista dentro, este gameobjet el de la revista adentro tiene el script DESTRUYEENERO5


que contiene el tag que hace destruir el cartel que nos interesa en cada caso.


El script que contiene la destrucción por tag solo se pone en el cartel, el tag se pone donde se choca,

repito....

El script que contiene la destrucción por tag solo se pone en el cartel, el tag se pone donde se choca,

repito....

El script que contiene la destrucción por tag solo se pone en el cartel, el tag se pone donde se choca,

y cada script de destrucción por tag su personal tag y su personal elemento donde choca.

En el video intento explicarlo.....hay un pequeño fallo e puesto también los escripts

DESTRUYEENERO5

donde choca el cartel y no es necesario solo hay que ponerlos en los carteles y el nombre del tag en el gameobject donde choca el cartel.


Como hacer un circuito de coches.


En este vídeo, muestro los pasos que sigo, para hacer una calle llena de coches circulando,en el juego nuevo que estoy realizando, con coches que se van cruzando continuamente,

por su puesto, no e echo docenas de coches, solamente hay 4 o 5 que se van repitiendo mediante los dos scrpts en c# que pongo a continuación.

Observando el vídeo veréis que los coches chocan con unos cubos rectangulares.

Estos tienen un tag con nombre “datelavuelta”.

Los coches tienen dos scripts en c# con nombre “muevedeladoa52 y “muebeladotagybuelta”

los coches también tienen el tag con nombre “datelavuelta”. Aunque no es necesario que tengan puesto este tag, esto lo aprendí esta mañana y faltaba pulir solo este detalle, en los coches no se necesita nombrarlos con el tag “datelavuelta”.


Pero en las barreras donde se choca SI ES IMPRESCINDIBLE QUE TENGAN EL TAG PUESTO CON EL NOMBRE “datelavuelta”.

Las imagenes balen mas que mil palabras....obserbar el video con atencion....paso también los scripts.


using System.Collections;

using System.Collections.Generic;

using UnityEngine;


public class muevedeladoa5 : MonoBehaviour {


    // Use this for initialization

    void Start () {


    }


    // Update is called once per frame

    void Update () {


        transform.position += transform.forward * 9f * Time.deltaTime; }


    }


using System.Collections;


using System.Collections.Generic;

using UnityEngine;


public class muebeladotagybuelta : MonoBehaviour {


    // Use this for initialization

    void Start () {


    }


    // Update is called once per frame

    void Update () {


        //transform.position += transform.forward * 10.2f * Time.deltaTime; }


    }


void OnTriggerEnter(Collider other) {

            //if (other.gameObject.CompareTag ("avismo")){

        //if (other.gameObject.CompareTag ("ogri2")){

            if (other.gameObject.CompareTag ("datelavuelta")){


        transform.position -= transform.forward * 2800.2f * Time.deltaTime; }


    }

}


//}


https://gamejolt.com/games/PROGRAMADOR_O_PROGRAMADO/547994 


El videojuego funciona bastante bien en los navegadores de teléfonos móviles o phones de gama media, el personaje corre solo y solo hay que giarlo con el dedo......continuara

ATENCION A LA VERSION PARA TELEFONOS Y PHONES O TABLET 
 

No hay comentarios:

Publicar un comentario